
Key takeaways
- Texturing applies color, roughness, reflectivity and surface detail to a 3D model's geometry, and it is what makes a shape read as a believable material under light.
- Modern workflows are built on UV unwrapping plus PBR (physically based rendering) maps: base color, roughness, metallic, normal, height and ambient occlusion.
- Most engines and the glTF web standard use the metal/roughness model; the older specular/glossiness model still appears in some film and legacy pipelines.
- Textures can be hand-painted, generated procedurally, or built from photographed and scanned materials; most professional work blends the three.
- A clear brief (reference images, target engine or renderer, resolution needs, UDIM or single-tile UVs, deadline) reduces revision rounds when hiring a freelance texture artist.
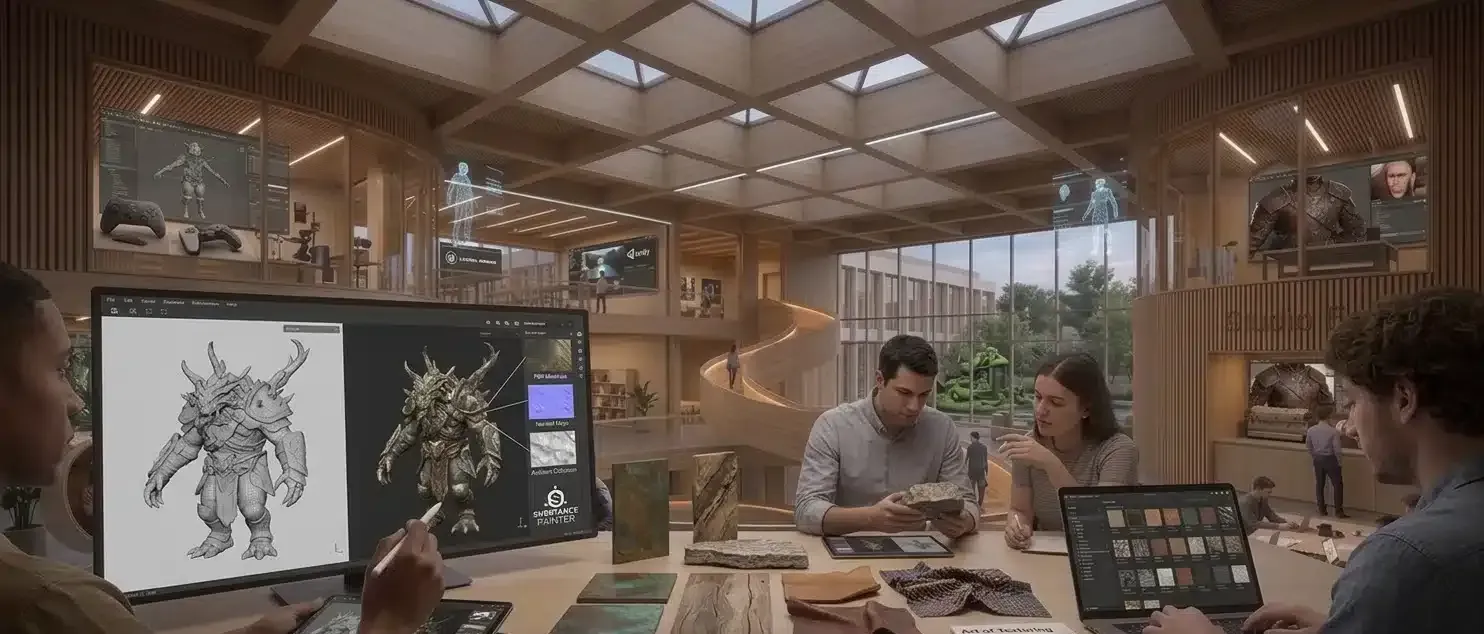
Texturing is the process of defining how a 3D model's surface looks and behaves under light: its color, roughness, reflectivity, scratches and material identity. A model's shape only becomes a believable object — worn metal, damp stone, skin, fabric — once texturing is applied.
Modeling builds the geometry; texturing decides what that geometry is made of. The two skills are often handled by different specialists, and getting texturing right is usually what separates a flat CG object from one that reads as real.
What is texturing in 3D design?
Texturing is the process of applying surface information (color, roughness, reflections, bumps, material properties) to a 3D model so it interacts with light the way a real material would. It works through texture maps: 2D images projected onto the model's surface via its UV coordinates.
A bare 3D mesh only holds shape data. Textures add everything a shape cannot express on its own: whether a surface is painted or rusted, smooth glass or brushed steel, dry concrete or wet asphalt. This is also why the same model can serve many purposes — a car body can be reskinned in different paint finishes without remodeling a single polygon, only by changing its textures.
How does UV mapping work?
UV mapping unfolds a 3D model's surface into a flat 2D layout so that 2D texture images can be applied to it accurately, much like unfolding a cardboard box into a flat template. Each point on the flattened "UV" layout corresponds to a point on the 3D surface.
The process, called unwrapping, involves cutting the model along strategic seams (usually hidden edges) and laying the pieces out to minimize stretching and overlap. A well-built UV layout:
- Keeps consistent texel density (texture resolution per surface area) across the model, so no part looks blurrier or sharper than the rest.
- Hides seams in places the camera or player rarely sees.
- Avoids overlapping UV shells unless intentional (for tiling or mirrored parts).
- Leaves enough padding between UV islands to prevent color bleeding at lower resolutions.
For assets that need more texture space than a single 2K or 4K tile can hold — a hero character or a detailed vehicle, for example — artists use UDIMs, a system that spreads the UV layout across multiple numbered tiles instead of squeezing everything into one square. UDIM was created in 2002 by Weta Digital and later became the standard workflow in Foundry's Mari, the texture-painting software Weta built for productions such as Avatar; it is now supported across most major 3D and texturing applications.
What are PBR materials and texture maps?
PBR (physically based rendering) is a texturing and shading approach that simulates how light really interacts with materials, using standardized maps instead of manually faked highlights. It produces consistent, predictable results across different lighting setups and render engines.
A PBR material is typically built from several maps working together:
| Map | What it controls |
|---|---|
| Base color / albedo | The material's raw color, with no lighting or shadow baked in |
| Roughness | How sharp or blurry reflections are (smooth vs. matte) |
| Metallic | Whether a surface behaves as a metal or a non-metal (dielectric) |
| Normal | Small surface bumps and dents, simulated without added geometry |
| Height / displacement | Larger surface relief, used for real geometry displacement or parallax effects |
| Ambient occlusion | Soft shadowing in crevices and contact areas |
These maps are combined by a shader at render time. Change the roughness map alone, for instance, and the same base color can read as either polished chrome or brushed aluminum.
Metal/roughness vs. specular/glossiness
There are two common ways to describe a material's reflectivity in a PBR workflow: metal/roughness and specular/glossiness. The glTF 2.0 specification — the open standard maintained by Khronos for 3D content on the web — defines the metallic-roughness model as its core material representation, which is why it is the default across most modern real-time pipelines.
- Metal/roughness: uses a base color, a metallic value and a roughness value. Fewer maps, simpler to author correctly, and the default in Unreal Engine, Unity, Blender's Principled BSDF, and glTF.
- Specular/glossiness: uses a diffuse color, a specular color and a glossiness value, giving more direct artistic control over reflectivity per color channel. It survives in some film pipelines and legacy game engines but has been superseded almost everywhere else, including as an optional (and now deprecated) glTF extension.
For a new project, metal/roughness is almost always the right default unless a specific legacy pipeline requires otherwise.
Procedural, hand-painted or scanned: which texturing approach is best?
There is no single best method: procedural, hand-painted and photo-based (scanned) texturing each solve different problems, and most professional pipelines combine them. The right choice depends on the material, the required realism and the production timeline.
- Procedural texturing generates materials from algorithms and node graphs (rust patterns, wood grain, noise-based imperfections) rather than painting pixels directly. It is resolution-independent, fast to iterate, and ideal for tiling materials like terrain, brick or fabric. Adobe Substance 3D Designer is the reference tool for this approach.
- Hand-painted texturing relies on an artist painting details directly onto the model, often in Adobe Substance 3D Painter, giving full control over storytelling details: specific scratches, grime placement, hand-drawn stylized looks.
- Photo-based and scanned textures start from real-world photographs or photogrammetry scans of physical materials, offering strong realism with less manual work. Libraries such as Quixel's Fab (formerly Quixel Megascans) provide large sets of pre-scanned, PBR-ready materials.
Baking is the step that connects these approaches to production-ready assets: it transfers detail from a high-resolution sculpt, or from procedural layers, down onto the maps used by the final low-resolution or game-ready model.
Which software do 3D texturing artists use?
Professional texturing artists mainly work in Adobe's Substance 3D suite, alongside Blender, Mari and scanned-asset libraries, choosing tools based on the target pipeline (game, film or product render).
| Tool | Best for |
|---|---|
| Adobe Substance 3D Painter | Hand-painting and layering PBR textures directly on a 3D model |
| Adobe Substance 3D Designer | Building procedural, resolution-independent materials |
| Adobe Substance 3D Sampler | Converting photos and scans into PBR materials |
| Foundry Mari | UDIM-heavy texture painting for film and high-end VFX |
| Blender | Free, integrated modeling, UV unwrapping and texture painting |
| Quixel Fab | Scanned material and asset libraries, ready for PBR pipelines |
What resolution should textures be for games, film or product renders?
There is no universal texture resolution; the right size depends on texel density (texture pixels per real-world unit) and how close the camera or player will get to the surface. What matters is matching resolution to viewing distance and platform budget, not maximizing resolution everywhere.
- Real-time games commonly use 2K or 4K textures per UDIM tile, since every texture consumes GPU memory that is shared across an entire scene. Background props often use lower resolutions than hero characters or weapons seen up close.
- Film and high-end product renders are not limited by real-time memory, so textures frequently reach 4K–8K per tile, prioritizing detail over render-time cost.
- Hero assets (anything the camera lingers on) always deserve a higher texel density than secondary props, regardless of the target medium.
What are the most common texturing mistakes?
The most frequent texturing mistakes come from problems introduced earlier in the pipeline, not from the painting stage itself. Fixing them after the fact is far more expensive than avoiding them.
- Inconsistent texel density, making some parts of a model look sharper or blurrier than neighboring parts.
- Visible UV seams, from poor seam placement or missing padding between UV islands.
- Mixing PBR workflows, such as combining specular/glossiness maps with a metal/roughness shader without conversion.
- Overusing tiling patterns without breaks or variation, creating an obviously repeated look.
- Skipping ambient occlusion or height detail, leaving flat-looking surfaces even with a good base color map.
- Ignoring the target engine's map format (channel packing, texture compression, color space), causing washed-out or overly dark results after export.
How do I brief a freelance texturing artist?
A good texturing brief gives the artist the model's UVs, clear material references, the target engine or renderer, and resolution requirements, so quotes are comparable and revisions stay minimal. Before posting a project, prepare:
- The 3D model file, with UVs already unwrapped (or note that unwrapping is part of the job).
- Reference images for every material: real photos, mood boards, or a brand's existing material library.
- The destination: a specific game engine, a render engine, a web viewer (glTF), or a print/film pipeline.
- Target resolution and whether UDIMs are needed.
- Any style constraints: photorealistic, stylized, matching an existing product line.
- The number of revision rounds included in the quote.
This is the checklist we recommend to clients posting a texturing project on Hi 3D: the clearer the references and target pipeline, the fewer back-and-forth rounds a freelance artist needs before delivery.
Texturing is where a 3D model stops being a shape and becomes a specific, believable object — and it is a skill distinct enough from 3D modeling that many studios hire specialists for it. Whether you need PBR materials for a product render, a stylized character for an animated project, or game-ready assets, you can browse verified freelance texturing artists or post your project to get quotes from specialists who work in your target pipeline.
Frequently asked questions
What is texturing in 3D?
Texturing is the process of defining how a 3D model's surface looks and reacts to light: its color, roughness, reflectivity, small bumps and material identity (metal, wood, skin, fabric). It is applied through texture maps projected onto the model's UV coordinates, turning bare geometry into something that reads as a specific, believable material.
What is the difference between a texture and a material?
A texture is an image file, such as a base color or roughness map. A material is the combination of several texture maps plus shader settings (how they are mixed, whether the surface is transparent, how it responds to light) that a render engine uses to draw the surface. One material typically references four to six texture maps working together.
What are UV maps and why do I need them?
A UV map unfolds a 3D model's surface into a flat 2D layout, similar to unfolding a cardboard box. Texture maps are 2D images, so the model needs this flattened coordinate system to know which part of the image lands on which part of the geometry. Poor unwrapping causes stretching, seams and wasted texture resolution.
Metal/roughness or specular/glossiness: which PBR workflow should I use?
Use metal/roughness for real-time engines (Unreal Engine, Unity, most game and web pipelines) and for glTF, the open standard for 3D on the web. It needs fewer maps and is easier to keep physically plausible. Specular/glossiness offers finer artistic control over reflectivity and still appears in some film and older game pipelines, but it is no longer the default anywhere.
What resolution should game, film and product-render textures be?
There is no fixed rule; it depends on texel density and viewing distance. Real-time games commonly use 2K or 4K textures per UDIM tile to fit memory budgets, film and product renders often go to 4K–8K per tile since render time matters more than VRAM, and hero assets close to camera need higher texel density than background props.
How do I brief a freelance texturing artist?
Share the model's UVs (or ask the artist to unwrap it), reference images for the target materials, the destination engine or renderer, target resolution and UDIM needs, brand or color constraints, and the number of revision rounds included. On Hi 3D, this checklist is what we recommend clients prepare before posting a texturing project.
The Hi 3D Team
Hi 3D connects companies with verified freelance 3D artists worldwide. Our team writes practical guides drawn from the projects we see on the platform every day.
Need a 3D artist for your project?
Browse verified freelance 3D artists, compare portfolios and get your project started on Hi 3D.